

1/72 Scale Eduard Heavy Retro Turbolet L-410 UVP
- surber3
- May 22, 2025
- 5 min read
Build Article – by The Masked Modeler
May 2025
This kit is a new edition of the Eduard Heavy Retro line in which the artisans of the Czech Republic company have enhanced an older kit with great potential from another company. Originally kitted by Gavia in 1997, this mold has also been previously released by AZ Model. Eduard have spiced things up quite a bit by including two large decal sheets covering six versions, 3D printed detail parts, cast resin wheels, photoetch details and precut masks to round out the package.
Let me say at the outset, although this kit can be made into a beautiful display model, it is not for beginners. Those who attempt it should have some experience with removing 3D printed parts from their framework and resin wheels from their casting blocks as well as experience assembling separate propeller blades to a prop boss along with complex masking and the use of photo etch metal parts. There are also no locating pins or slots to aid assembly. That being said let’s jump into assembly.
Since I am writing this build review with the experienced modeler in mind, I will not be detailing every step of the assembly process but rather make note of difficult, confusing or tricky parts of the build.

A word about the instruction booklet: Eduard have provided box art on the cover, a part map representation of the gray molded and clear parts trees, photo etch parts tree, mask sheet and resin parts. Also included on this page are the paint color codes in Gunze Aqueous and Mr. Color only. Pages 3 through 8 consist of the assembly steps followed on page 9 with color coded diagrams of the precut masks and their placement. (Future releases will have the masks themselves color coded – a great aid to the modeler.) Eduard have only gotten better at producing enjoyable instructions which include full color 4 view depictions of the six decal options on pages 10 through 15.

Assembly begins with passenger and pilot seats, and this is the first problematic issue. There are no locating pins for these or any other parts in this kit, so assembling 14 identical seats can be a bit of a challenge. The modeler is also directed to cut off and discard the front portion of the cockpit floor. I found several contradictions in these instructions so test fit and measure twice and cut once. There are also seat belt decals for each one of the 14 seats (that means 24 decals to be applied if you so choose) Rest assured that very little of the interior can be seen through the tiny windows on the finished model.
Which brings us to the next challenge: The passenger windows (16 of them) all have dreadful sink marks which must be aggressively sanded out and polished again to clarity for an acceptable presentation. You can forgo this process and after final painting use Crystal Clear or another product to create your own scale appearing passenger windows. If gluing the clear styrene windows, be sure they are secure before joining the fuselage halves. I had one fall inside and had to provide one liquid window as described above.

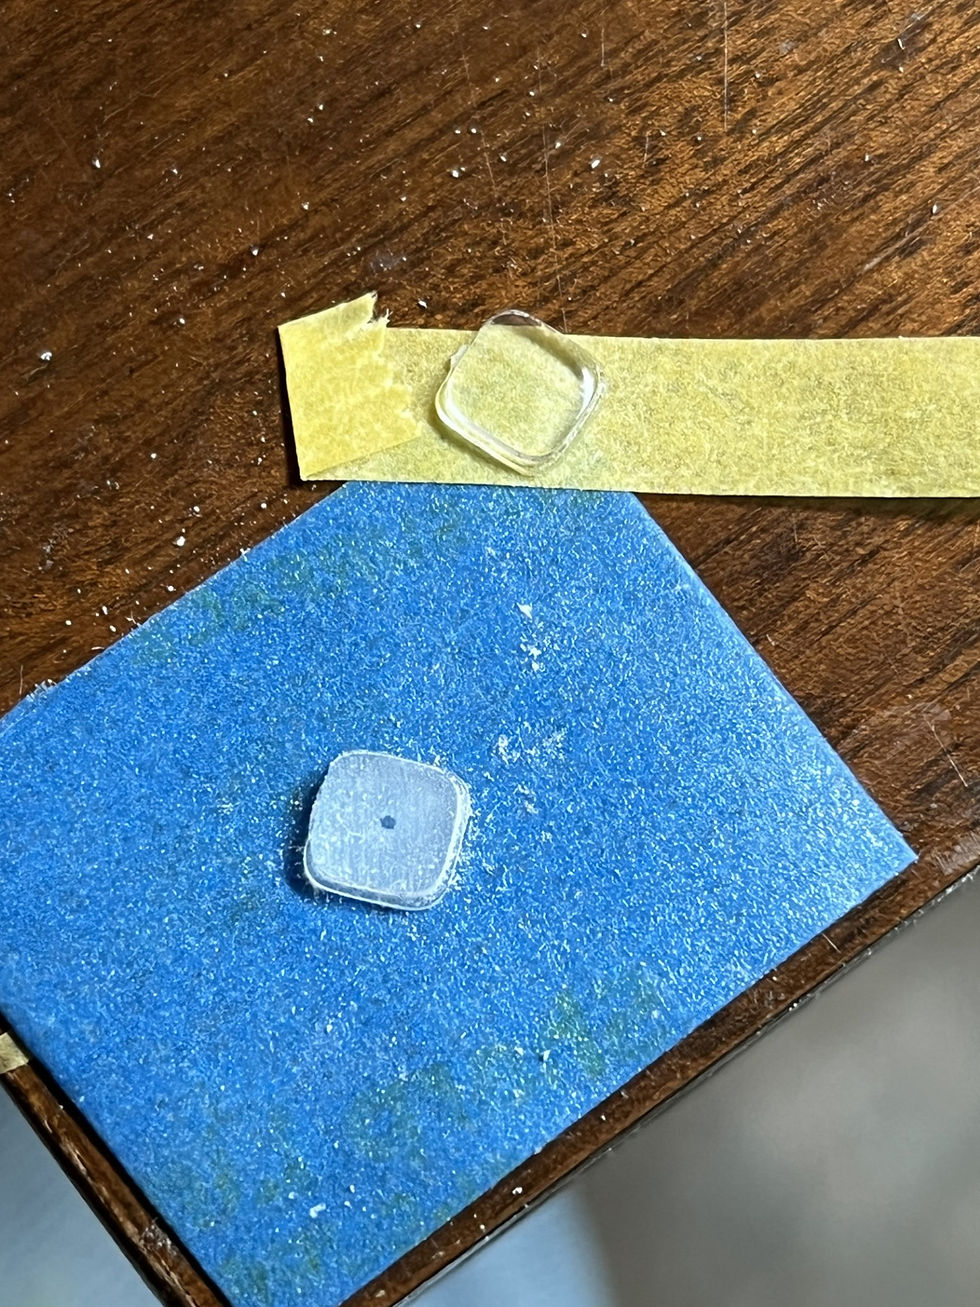
Surgery is required in order to replace the molded nose with the provided clear part. I suppose this is optional, although the clear part allows display of the nose landing lights, deftly depicted with two sandwiched photo etched parts. As you see from this photo, I did not take my own advice and needed to glue in a styrene shim after I cut too much off the nose. Another factor to consider at this point is placing appropriate nose weight to prevent a tail sitter. Assembly instructions warn not to forget nose weight, but no specific weight is given. I ended up using two-part 5 minute epoxy to glue in bits of lead weight in the engine nacelles and the clear nose, and just about anywhere I could fit it ahead of the main gear balance point.

The wings have some blemishes but these can be sanded out or covered with primer without difficulty. The 3D printed propellers, boss and nose cone are a joy to assemble, and they are keyed for either in-flight or parked configuration. The landing gear sponsons have no locating pins and their placement is a compromise at best. I found the best approach was to assemble the sponsons without the gear or doors, and glue them securely on the fuselage and after dry, applying filler to fair in the mating surfaces.

At this point it would be a good idea to tape the assemblies together, wings elevators and engine pods and test for how much weight is needed in the nose to prevent the beauty from sitting on her tail. I used 177 caliber lead pellets, pounded flat and secured with two-part five minute epoxy. I placed weight in the nose and each of the engine pods, making sure to provide space for the prop shafts and clear nose part to be affixed.
The elevators are attached with a butt joint, so care needs to be taken to get the proper dihedral. A diagram is included in the instructions on page 6 detailing both the angles of the elevators and the main wings, 1.5 degrees dihedral for the main wings and 7 degrees for the elevators.
Some of the photo etch details are quite small, easily lost and difficult to attach properly in this scale. I omitted all but the most prominent. The nose gear door is supplied as a photo etched assembly, made up of 4 pieces and is a clever scale appearing solution. Part of the plastic door (part 24) will have to be cut off and discarded if you plan to model the aircraft on the ground.
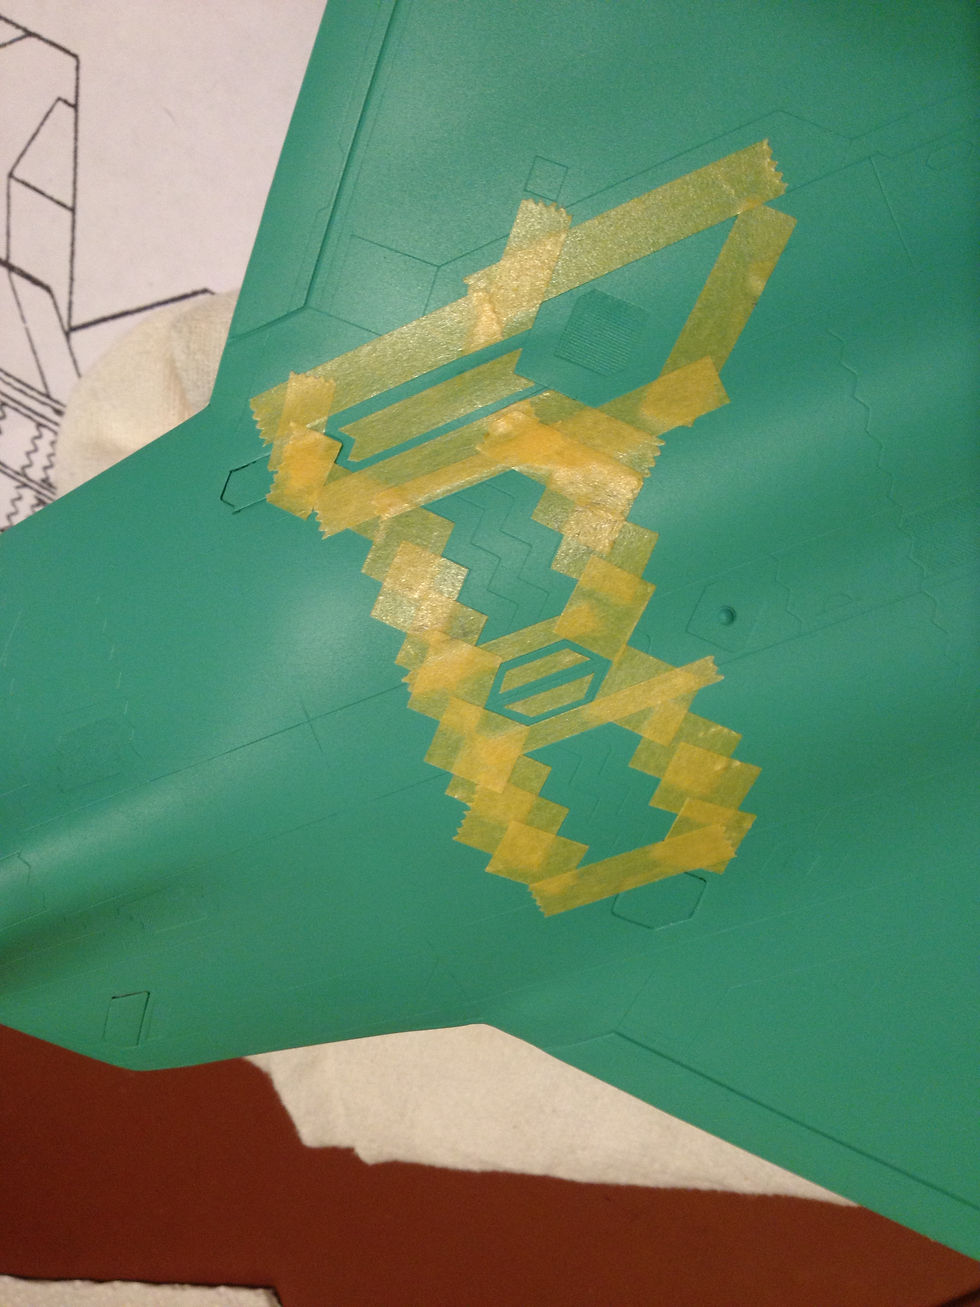
The landing gear are quite stout and hold the model with the additional nose weight without sagging or breaking. The masks are color coded in the instructions to clarify their placement although the masks themselves are not. This has been recently remedied by Eduard who recently announced the "Glue and Clue" line of improved precut masks. Regarding the masks from this kit, they are all cut to perfect size and with the landing lights, cockpit windows and all 14 passenger windows, they speed the masking and painting process greatly.
Decals are of Eduard’s usual high quality, and you can optionally remove the clear film after they are set and dried. As per usual, they slip into place and adhere best to a glossy surface.
The Eduard Turbolet L-410UVP can be built into a beautifully completed model by any experienced modeler. I give this Heavy Retro release by Eduard a big thumbs up.


Comments